Why does blogging feel like a chore this week? I usually love to blog and enjoy finding great things to share, and still do, it's just the getting it posted part that is annoying. For example, yesterday I took all the pictures and thought up the post for my cooking blog but I just never got around to publishing the post. *sigh* I am in cram mode now!
Anyhow, today is a post on something I plan to be doing in my office/craft room in the very near future. Rearranging! Sometimes, you have a room in your house that no matter what, just does not stay organized. And it's not always the fault of people who use the room, sometimes, the room is just not set up to optimize organization.
So where to start? First off, don't move anything!
Grab some graphing paper and measure the room. Figure out a scale that will work on the sized paper you have draw out the the room include any columns if they are in the room, windows, doors, etc.,
Then, get another sheet of graphing paper and some scratch paper. On the scratch paper, measure all of the furniture that you want in the room, sofas, desks, chairs, EVERYTHING! One by one, draw out the perimeter of the furniture/item to go in the room on your spare graphing paper (to the same scale as your room paper) and then cut-out each item.
The fun and easy part is next. Now you can arrange all the furniture on the paper without straining your muscles moving something to one side of the room only having to push it somewhere else later! This is what I did for our son's nursery and it was a lifesaver!
When you chart things out this way, you will be surprised how much furniture you can fit in a room without it feeling crammed or cluttered.
Once you have figured out your furniture arrangement, think about accents. Would shelves on the wall above a dresser make the room more functional? How will you utilize closet space? Plan out a place for as many items as possible, and then get to work making your mental image a reality.
It is so much easier to make sense of things spatially and organizationally when you can think out before just going in there and moving stuff around!
Good luck! I promise to post my office makeover when it is complete.

Tuesday, September 7, 2010
Monday, September 6, 2010
Make It Yourself Monday - Apple Pie Pops and mini apple pies!
In honor of Labor Day, today's make it yourself is getting a little American with some great apple pie variations!
You can start with your favorite prepared apple pie filling. I usually just do cut up apples with cinnamon, brown sugar, and a little bit of nutmeg. Set the filling aside in a bowl and prepare your pie crust, you can use any pie crust but for the pops you will want enough to line a baking sheet twice.
Now comes the fun part!
Apple Pie Pops:
1. On a greased baking sheet roll out your pie crust and use cookie cutters or another shaped object to cut out the dough. This can get really fun because you can use star shapes for 4th of July, hearts for valentine's (use cherry pie filling for red!), and just get creative!
2. Drop a spoonful of your apple mixture into the center of the each pie dough shape and then add your lollipop stick.

3. Cut out a second copy of your pie crust shape and place this over your pop. Crimp the edges securely, you may want to fold it over a little.
4. You can brush whisked egg yolk and water over each pop for a brown, flaky crust and sprinkle a little cinnamon and sugar over it too.
5. Bake for 15 minutes or until golden brown.
Mini Apple Pies:
1. Get a muffin pan and grease it. Cut out circles in your pie crust slightly larger than the muffin tin, and press the crust into it as you would to a regular pie pan.
2. Add filling.
3. Add lattice topping
4. Bake according to your pie instructions, or until crust is browned.
And if you want to go all out you can make cute little apple shaped personal pies with the mold from Williams-Sonoma
A perfect treat, that happens to be as easy as pie.


You can start with your favorite prepared apple pie filling. I usually just do cut up apples with cinnamon, brown sugar, and a little bit of nutmeg. Set the filling aside in a bowl and prepare your pie crust, you can use any pie crust but for the pops you will want enough to line a baking sheet twice.
Now comes the fun part!
Apple Pie Pops:
1. On a greased baking sheet roll out your pie crust and use cookie cutters or another shaped object to cut out the dough. This can get really fun because you can use star shapes for 4th of July, hearts for valentine's (use cherry pie filling for red!), and just get creative!
2. Drop a spoonful of your apple mixture into the center of the each pie dough shape and then add your lollipop stick.
3. Cut out a second copy of your pie crust shape and place this over your pop. Crimp the edges securely, you may want to fold it over a little.
4. You can brush whisked egg yolk and water over each pop for a brown, flaky crust and sprinkle a little cinnamon and sugar over it too.
5. Bake for 15 minutes or until golden brown.
Mini Apple Pies:
1. Get a muffin pan and grease it. Cut out circles in your pie crust slightly larger than the muffin tin, and press the crust into it as you would to a regular pie pan.
2. Add filling.
3. Add lattice topping
4. Bake according to your pie instructions, or until crust is browned.
And if you want to go all out you can make cute little apple shaped personal pies with the mold from Williams-Sonoma
A perfect treat, that happens to be as easy as pie.
Friday, September 3, 2010
Transitioning to Milk
Well, the day has finally come and we have gotten permission from the pediatrician to start our 10 month old on milk.
He said to start giving him 4oz. of formula mixed with 2 oz. milk for 1 week, and see how he does.
The first week is almost over and he's been great! Loves his food, no upset tummy as far as I can tell, and our formula is lasting a bit longer which is nice.
Next week, I think we are supposed to start doing 2 oz. formula with 4 oz. milk. I honestly can't remember if it was that or half milk half formula though. So the plan is to start with half and half for a few days and if he does good then maybe switch it around Wednesday or Thursday.
This has also been a gerat way to start transitioning to a sippy cup. I've noticed he won't drink his regular formula out of a sippy cup, it's like he needs a different drink. So I have started giving him his combo formilk in the sippy cup and it is a great success!
I'm really excited to not have to spend money on formula anymore, but honestly, we are now going through milk really fast! Regardless, the milk is definitely cheaper. I guess i'll just have to buy more milk at a time :)
Hope you all have a great week, I am working on some fun crafts for next week.
Wednesday, September 1, 2010
Adding Pockets to Clothes Tutorial
What mom, or kid for that matter, doesn't need more pockets? I know many a times at church I have tried to stash my cell phone in my dress or skirt only to have it fall straight to the floor because my skirt had no pockets!
Well, lament no more. I bring you a fabulous tutorial to add hidden pockets to clothes (although personally, i think front pockets are cute and fun). Sometimes it's nice to have a secret pocket somewhere for you know, phones, rocks, seashells, marshmallows (for secret eating)...
Notes From A Very Red Kitchen is here to deliver that for you. Enjoy the tutorial!
Tuesday, August 31, 2010
Tips for Tuesday- Keep Your Cool
Let me paint a picture for you. It's 7:30pm, your child should be asleep, but he's not, he's been fussy and cranky all day. You're waiting for your husband to come home so that you can go grocery shopping for this week's dinner but he is nowhere to be found. You try to clip coupons but the little one rips the circulars from your hands, frustrated you move to the other side of the room. Five minutes later, you hear a loud crash and see that your favorite floor lamp has been pulled to the ground and shattered by your precious child. He is safe, but your lamp is beyond repair.
Is this hard to imagine? It shouldn't be because it is a true life experience of what my day was like today. So what did I do? I did the best I could. I put my son in his crib so he wouldn't walk into the broken glass, and cleaned up for a bit. I was still really frustrated so I let my son hang out for awhile in his crib still, not very happy but safe. When I calmed down and finished cleaning up, I took him out and brought him grocery shopping playing some of my favorite tunes along the way.
It helped a great deal and if you were reading closely you can pull out some good "Keep Your Cool" tips from my experience today:
1- Remember 90% of the time, whatever it is that's frustrating you was just an accident and what's done is done.
2- Keep your child in a safe place and take some time for yourself
3- Listen to some music that helps you with your feelings, and then switch to something relaxing. Personally, I go from Taking Back Sunday to Missy Higgins. i love them both
4- Take your mind off of it. Go grocery shopping, to the library, somewhere you enjoy and can focus on something else.
5- Exercise. Running, yoga, cycling, all of these are great stress relievers and help you get rid of extra negative energy.
Also, don't underestimate the power of deep breathing, and even just talking to yourself to sort out your feelings and work out your next step.
Monday, August 30, 2010
Make It Yourself Monday - Low to No Sew Halter Top
I got the original idea for this from Found in The Ali's No Sew Halter Top tutorial I just tweaked it a bit to meet my needs.
Instead of using a large T-shirt I used some fabric I have been wanting to turn into an article of clothing. I sewed the fabric into a tube and then just followed the tutorial.
Also, to make things a little different I made a braided halter top strap and used that to tie on the front ends instead of just a strip of fabric.
I didn't like the idea of the strips tied all together in the back because it just didn't work right for me, so I also braided a backing strap and tied that to it as well.
Altogether very similar, and very easy! I love my new braided halter top and it only cost me $2.00 unlike the ones going for over $15.00 in stores.
Friday, August 27, 2010
Great Books For 1-Year-Olds
My little boy's 1st birthday is coming up, and I can. not. wait. Mostly, because I am sooo excited to start planning his birthday party!
To celebrate the oncoming of his birthday I am linking you all to Prudent Baby for the great recommendation list of books for under 1.
There are also links on the site for book recomendations for under 2. So check it out and enjoy!
To celebrate the oncoming of his birthday I am linking you all to Prudent Baby for the great recommendation list of books for under 1.
There are also links on the site for book recomendations for under 2. So check it out and enjoy!
Monday, August 23, 2010
Flying on an airplane with kids Tips for Travel
In honor of my trip to Alaska I am posting a series of traveling tips for you and your little ones! I work for an airline so traveling with children is something I am a near expert on as my son has been on planes pretty much his whole life!
The most important thing is keeping your kids entertained. JetBlue is the perfect airline for the older kids because every single seat has it's own TV and it's completely FREE! However, my 10 month old doesn't wear headphones yet so it's not realistic to think the televisions would entertain him.
Instead, I pack some of his favorite foods and when he starts to get fussy I pull down the tray and put the foods there. It will usually entertain him for awhile and when he's done he likes to play with the tray itself.
If your child is anything like mine, it's also near impossible to get them to sleep on a big plane with lots of people and things going on, so I always pack a blanket or large sweatshirt. I put this over both myself and him and usually, once it's dark and he's not distracted by everything else, he falls asleep.
A pacifier is always good to have on hand for take-off, or some hard candy for toddlers, gum for older kids, to alleviate pain when ears are popping.
When it comes to TSA guidelines, you are welcome to bring formula/breast milk, bottled water, juice, and of course baby food/ solid foods, and any necessary medicines through security. Try to mark these separately and pull them out of your bag in a separate bin in case the agents need to check them. If your containers are 3 oz. or less, they shouldn't need to be checked.
Check the airlines baggage policy. When you travel with children, JetBlue allows an additional carry-on item such as a diaper bag, so you don't need to stuff all of your things, as well as baby's in one bag. Carseats and strollers don't count against your checked baggage, and you can gate-check any of these items.
You can purchase a seat for your little one but it gets expensive. Instead, if you are traveling with someone else, and the plane is 3 seats across, assign your seats to the aisle and the window. Most likely the middle seat will stay empty and you can probably set your child (car seat required!) in the empty seat.
If you are traveling on your own (as is often the case for me) instead of lugging the car seat all around the airport, opt for a baby sling or infant carrier. I love my Baby Bjorn that I got off of a site similar to CraigsList. Take it out for some practice walks first though as every baby has a different preference to carrier style.
And the last and final tip for traveling on a plane with children is Never be afraid to ask for help! Most airlines allow you to call in advance and request a "Meet And Assist" which will entitle either the person dropping you off at the airport to get a gate pass to help you and your younging to the plane, or they will have airport staff assist you if you are on your own, both on and off the aircraft.
I hope these tips are helpful for you! Happy traveling!
Friday, August 20, 2010
Cute Maternity Shirt Tutorial
Even if you're not expecting, you can adapt this to make a cute tunic. Who doesn't want to hide a few pounds? I know I do....
ANYWAY! Cute tutorial taken from imakestuff4fun (link will take you there)
Finished product:
Very cute, huh?
ANYWAY! Cute tutorial taken from imakestuff4fun (link will take you there)
Finished product:
Very cute, huh?
Thursday, August 19, 2010
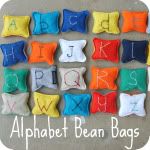
Alphabet Beanbags From Old Clothes
I am so excited about today's tutorial I am skipping the auto post and posting it TODAY!! YAY! I plan on making these for my little one (probably will be abirthday present...)
I have stumbled upon a gem of a blog it's DollarStoreCrafts.com
See if we can follow this now, today's tutorial was posted on Dollar Store Crafts but originally from Notes From a Very Red Kitchen (which by the way, is also a great blog!) and now it's being posted here. Or at least we are posting a link to it here...
Alphabet Bean Bags from old T-shirts and fabric scraps!! AWESOME!
Here it is. Enjoy!
A little tip here i would like to throw in, if you are like me and have a die-cut machine (I have a Pazzles and LOVE it!) instead of using your sewing machine to make the letters, you can also cut-out the letters in fabric on your machine and use a strong adhesive to put it on the beanbags.
Wednesday, August 18, 2010
DIY Diaper Caddy
This tutorial for a super cute Diaper Caddy comes from Noodlehead today.

Go check it out! I am going to make mine tonight.
Go check it out! I am going to make mine tonight.
Tuesday, August 17, 2010
Tips for Tueday- Baby's Schedule & Finger Foods
When I was a new mom, after the "newborn always sleeping" wore off, I had to figure out my baby's nap schedules. I t was really hard! Until I found an amazing article in a parenting magazine (I wish I could remember where) that said 2-6 months naps should be every 2 hours from the time the wake up from their last nap. It was a complete change! My baby was happier, went down for naps easily, and I got a break from having to hold him in order to get him to sleep.
Since I don't have the article to share I found on Baby Center a similar tool. They have parents submit their schedules, you can search them to get an idea of what works for you. Right now we are pretty similar to the "Work-At-Home Formula Feeding Mom" schedule. But find one for you depending on your child's age. Check it out here (Just scroll down to the links after the article).
And since I've decided to make today a Twofer Tuesday here is a tip about finger foods. I love finger foods because they don't require me to be sitting there feeding Thomas, and he improves his fine motor skills. Baby Center also has a great List of finger foods. If you also give your baby a spoon for himself to hold while eating, they will learn to feed themselves sooner. Thomas can bring the spoon to his mouth and eat (without making too much mess) but is still getting the hang of putting the food on the soon.
Monday, August 16, 2010
Make It Yourself Monday - Lampshade Rosettes
Today I am featuring a tutorial from Simply HandMade By Paige for a very pretty lampshade with flowers sewn on.

I love this tutorial because the flowers are sew easy to make, and you can use them for clothing, accessories, or as shown here, home decor. Very versatile and easy!
Enjoy! view tutorial
I love this tutorial because the flowers are sew easy to make, and you can use them for clothing, accessories, or as shown here, home decor. Very versatile and easy!
Enjoy! view tutorial
Friday, August 13, 2010
Keeping the House Clean With Kids - Day 5: Pencil it In (with weekly planner tutorial!)
If you plan to clean the house the same way you plan all of your other important schedules, it will be more of a priority and get done!
I am a "soft scheduler", so I like to just write down the things I need to do that day in a general order but without a specific time (aside from scheduled meetings, etc.,). But do whatever works for you.
Think about it beforehand though, then you can plan realistically. The other day I made my list of things I wanted to accomplish each day, and then put them in a realistic order. It's helped a lot! I then took that list, and made it into a very cute weekly planner (included in the end of this post).
Here is a sample of my list of daily goals:
Make Beds -this is first for obvious reasons
1 Load of Laundry
Blog & Read
Dinner- this comes next because I prepare dinner when the little one goes down for his nap. usually make it in a slow cooker so it's done by eating time.
Empty Trash
Stretch
Exercise 30 min. - All things I can do during the little ones nap
Bathroom clean-up - Done during and immediately after bath time
Clean 1 room
Home Improvement/Craft project
As you can see, I tried to list them in order of what works for my schedule throughout the day. There is no set time for each (but if you're that kind of person, do it! For example, if your kids are in school, you know there are certain times that will be easiest to clean- write it down!) they are just on paper for me to see everyday and get done!
Now the fun part! Yesterday I talked about incorporating crafts and fun things into the work. Here is something I did to get myself motivated and as a reminder of what my goals are. The best thing is I was able to use things around the house so it didn't cost me a dime.

What You'll Need:
Unused picture frame
Scrapbook paper (or fabric, wrapping paper, wallpaper, whatever you like!)
Some markers
Glue
Dry-Erase marker
How-To:
Pop out the back of the picture frame. Most have a cardboard backing of some kind, this is what you want to use to measure out the paper you will be using to go inside the frame.
Lay out your design on the board and cut it to fit the frame.
Write or print out your list of "Daily Goals" and "Weekly Goals". On my frame, I had a long list of daily ones (picture on the top right) and a shorter list of weekly goals which I placed beneath them. When you print your list out, you may choose to glue it on to a piece of colored paper that co-ordinates with your frame background.
Write or print out a small rectangle for each day of the week you want to include on your planner. You may also choose to glue these on to a cute paper.
*If you want to make a full month planner* Arrange the goals and days of the week on to the background paper accordingly and glue them in place.
You may choose to use a simple ribbon, small paper rectangles, or vinyl over the outside of the frame to section off squares for each day of the month. Adhere them to your project.
*If you want to do a weekly planner with a section for reminders* Find a cute divider which can be ribbon, a scrapbooking border, or simply a different colored paper rectangle cut-out and placed on to the background paper and arrange it near the bottom half of the frame or wherever you have chosen to place the reminders section.
Cut out an additional word rectangle that says, "Notes", "Reminders", "To-Do" you get the idea. Arrange all of the strips on to your paper background. When it looks good glue them all in to place.
You may choose to add additional embellishments or decorating on to your project at this point. For me, I added some little birds to represent me and the members of our family, a nice little reminder that accomplishing my goals for the week bless me, my home, and my family members.
Put everything together in the frame and hang on the wall. Mine is in the kitchen, where I can see and update it throughout the day.
Use your dry erase maker to write your appointments over the frame, erase when needed! Now remember the daily goals we put up? They're not just there to remind you, they're there to help you keep track! When you accomplish your daily goal, draw a line through that item for the day. At the end of the night, erase all your strike-thrus to begin again the next day and not have to re-write your list!

Thursday, August 12, 2010
Keeping the House Clean With Kids - Day 4: Get Crafty
There's no reason why you can't combine some of your favorite things with your least favorite things. For me, I love working on crafts so when I'm trying to clean, I try to incorporate fun crafts.
For example, the other day I got a great idea from my sister to make a hair organizer out of a shadow box frame. I took the frame, glued some cute scrapbook paper onto it, and the added some more strips of paper to make layers to put clips on, headbands, etc., The ledge inside the frame is perfect for small combs:

There are tons of great organizational ideas that involve crafts, you just have to get creative!
Wednesday, August 11, 2010
Keeping the House Clean With Kids - Day 3: Start Small
A small house is a curse and a blessing. I long for a bigger house, with a room for all of my things, and all of the husband's things, but at least our current house works well with my cleaning game plan: "One room a day keeps the dust bunnies away'".
Even if you have a big house, you can adapt this by cleaning just two rooms, or a room and a hallway a day. This doesn't mean to disregard every other room, still continue to do your most important things- cleaning up after yourself, etc., but if you focus on just one section at a time a week, your house will stay much more orderly and clean.
Here is a sample of my week, to help you figure out what works for you:
Monday Living Room- pick up things, vacuum, and dust picture frames and light fixtures.
Tuesday Kitchen/Dinig Room- make sure counters are wiped off, sweep and mop, quick cabinet wipe down and everything in between.
Wednesday Basement- since Wednesdays are my day off of work, I have the most time to focus on the biggest "problem room", which is my basement. The basement has my craft room and our office, as well as our food storage, so I clean up my crafts from the week, try to reorganize things rotate food if needed, etc.,
Thursday Baby's room & hallway- baby's laundry put away, things vacuumed, picked up, etc.,
Friday Bedroom - Our bedroom gets out of control (and I admit cleaning the other rooms through the week sometimes results in a lot of miscellaneous items being placed into the bedroom) so I spend this day organizing those items, clean the sheets, sweep, and all that other good stuff.
Saturday Bathroom & outdoors- Since the bathroom is the hardest room to clean with our little boy, I wait until dad is home to do this room. He can entertain our son and I can clean up a bit.
The outdoors is also saved for this day because some projects we do together as a couple, and the other things like the vegetable garden, and mowing the lawn, are my husband's projects so he gets those done on his day off.
As you can see, we have a small house but no matter what the size of your living area, it can be overwhelming to try and take it all on at once. Make it your priority for the day, whether you do it while the baby is sleeping, or while they are with friends, once you have that one room clean, you are free to do anything else and any other errands for that day. Focusing on one room a day does two important things:
1- It gives you a clear end AKA the escape route You know that if you can just get that ONE room clean that day, you have accomplished your cleaning goals. And it feels really good, and motivates you to do more, and often over achieve!
2-It allows you to be more focused and get done what really needs getting done You know how you really should get down and scrub the kitchen floor but it just seems overwhelming? Well, if you have an entire day, and just one room to clean, scrubbing the floor isn't that hard and doesn't take that long. Scrub the other floors in other rooms another day, today, it's just that room.
Of course, I don't always get everything done as much as I'd like. Although, I wish I could say I did. But most of the time, this plan works for me. Hopefully it works for you too!
Tuesday, August 10, 2010
Keeping the House Clean With Kids - Day 2: Chore Chart
A great, and fun way to keep your house in order when you have kids (and even if you don't) is to give yourself a daily reminder! As if the mess isn't enough ;)
Today U-Create Crafts had a GREAT tutorial on a very, VERY easy magnetic chore board for your family. And you can make it for under $10.

This is the finished product! I can't wait to make one of my own! I am planning to also paint over it with chalk paint, so I can write notes and reminders to myself.
I've included the supplies needed in this post but to see the entire tutorial view the original post here.
Here is what you'll need...
SUPPLIES:
-Wood (10x15 inches)
-Wood Block (Approx. 1.75x6 inches)
-Chipboard piece (11x17 inches)
-2 pieces of scrapbook paper PER chart
-Mod Podge
-Foam Brush
-Vinyl (optional)
-Sheet Metal (Found mine at Home Depot for .99 - in Roofing section)
-Accent/Plant Gems ($1 at Dollar Tree)
-Magnets
-Chore pics (clipart included)
-Hot Glue Gun
-Tacks (optional - at Lowe's - 24 pk. for $1)
Today U-Create Crafts had a GREAT tutorial on a very, VERY easy magnetic chore board for your family. And you can make it for under $10.
This is the finished product! I can't wait to make one of my own! I am planning to also paint over it with chalk paint, so I can write notes and reminders to myself.
I've included the supplies needed in this post but to see the entire tutorial view the original post here.
Here is what you'll need...
SUPPLIES:
-Wood (10x15 inches)
-Wood Block (Approx. 1.75x6 inches)
-Chipboard piece (11x17 inches)
-2 pieces of scrapbook paper PER chart
-Mod Podge
-Foam Brush
-Vinyl (optional)
-Sheet Metal (Found mine at Home Depot for .99 - in Roofing section)
-Accent/Plant Gems ($1 at Dollar Tree)
-Magnets
-Chore pics (clipart included)
-Hot Glue Gun
-Tacks (optional - at Lowe's - 24 pk. for $1)
Monday, August 9, 2010
Keeping The House Clean- With Kids Day 1
Man, this girl has got it together! In her post, "The Daily 7 For a Highly Successful Household" she pinpoints everything that seems to spin our house into a complete, exhausting mess by the end of the day.
I will copy her post at the bottom of this entry for those too lazy to click on a link (umm... me!), but first i want to say how I am going to take what she says and apply it in my own life! This is officially going into one of my goals for the "Feeling Fabulous" blog challenge.
Take a second to check it out, I think it's a great idea, for everyone! (sorry, no copy and paste for that one, you're actually going to have to click on the link!)
Without further adieu, "The Daily 7 For a Highly Successful Household" By Stephanie
"Ah, chores. They are such a necessary evil. As I mentioned in my Clean Less, Play More post: I don’t like to clean. Instead, I choose to do a tiny bit each day to ensure that I never waste a day cleaning house when I could be out conquering the world.
Or answering email.
Our family has a list of chores that we try our best to accomplish daily. Now that the kids are old enough to help, they do. When I am sick or am away from the house, the kids and Adam step up and help maintain order in the house.
Sort of.
We’re still real people, and we don’t live in a museum. I’m not going to lead you astray and say that I make sure the following tasks occur each and every day no matter what. I might burst into flames.
and the smoke detector started beeping last week and I haven’t replaced the batteries yet…
I came up with this Daily 7 after reading the Stephen Covey books. (I told you I liked to read personal development books!) I like how Covey breaks down complex tasks into 7 steps—not too many to get overwhelmed, but not too few that nothing gets accomplished.
Number 1: Make Beds Right Away
Number 2: Do One Complete Load of Laundry
Number 3: Empty All Garbage Cans
Number 4: Keep Your Kitchen Sink Empty
Number 5: Clean Up After Yourself and Help Children Do the Same
Number 6: Bathroom Wipe-Down
Number 7: Before Bed 10-Minute Clean Up
I have outlined all of these steps in the Totally Together Book in detail, but really they are quite self-explanatory.
Make Beds Right Away
The second you climb out of bed in the morning, make it. It’s such a wonderful feeling to have accomplished something at 6am. Teach your children to do the same—if beds are made daily, they don’t get destroyed as easily, and it really takes less than a minute to pull a sheet taught and straighten the comforter. If you haven’t already done so, streamline your bed linen to the bare essentials. There’s no need for 50 decorative pillows or an elaborate stuffed animal collection. Really.
Do One Complete Load of Laundry
A complete load means one that is washed, dried, folded, and put away. I’m not trying to be mean; I’m trying to be realistic. It is no fun to save all the laundry for one day a week and not be able to leave the house. Do a little each day, and you will no longer waste away a beautiful afternoon because you are stuck inside tackling a mountain of clothing. I hate ironing, but have found that if I iron clothes while slightly damp I save a ton of time.
Empty All Garbage Cans
On our honeymoon, Adam promised he would empty the garbage cans every single day without being asked. This hasn’t happened. It actually kind of pisses me off. Instead, the kids help with the wastebaskets in the bathrooms and their bedroom, and I take out the kitchen garbage every morning after emptying the dishwasher. If I fill it again during the day, I put it right in the middle of the kitchen with the recyclables and hope Adam trips over it. I’m kind of mean like that.
Keep Your Kitchen Sink Empty
I don’t know what it is, but if you put something, anything, into the sink, other pieces of flatware are magically drawn to it and all of a sudden the sink is completely filled and rendered useless. Instead, take the time to put your dirty items into the dishwasher right away, or wash the item quickly by hand. It really doesn’t take that long. Just do it.
Clean Up After Yourself and Help Children Do The Same
My friend Alison homeschools her nine children. I love Alison. I met her before having children of my own, and she is hands-down my mommy idol. She shared with me once that the secret to parenting is to remember that your goal is to raise capable adults. Chores are not only okay, they are necessary. Model good behavior for your children. Take the time to put your shoes all the way into the closet and hang up your coat. Once you are putting your own things away, your children will be more likely to follow suit.
Bathroom Wipe-Down
This is my favorite. I keep a container of disinfectant wipes in the bathroom, and wipe down the toilet (inside and out) every day. If it’s been a particularly um, busy day—I will do it twice. This keeps me from never having to scrub out the toilet with one of those scrubber brush things that I find beyond disgusting. I also quickly wipe down the shower stall and bathroom floor. After showering (or giving your children a bath), use an item from the dirty clothes pile to dry the shower walls and door. This will keep mold and soap scum from accruing. Now use your damp item to quickly mop up the bathroom floor. Dust and hair will disappear and will keep you from needing to mop.
Before Bed 10-Minute Clean Up
Before retiring for the night, do a super quick once over the living spaces of your house. Recycle the magazine left on the coffee table, and stack leftover drinking glasses in the dishwasher. Put the couch cushions in order, and fold the blanket. You will wake up much happier each morning if you aren’t greeted to last night’s mess."
Excerpt from The Daily 7 For A Successful Household
You're welcome!
Keep It Clean week! Tips For Keeping The House Clean With Kids!
After a looong vacation, Baby's Mama is back!! Little baby is growing up ;) but we are still here to help all mom's, at all stages of their kids lives.
This week we are focusing on something every mama struggles with. Keeping the house clean!
So all week we will be posting FABULOUS ways to help you get it under control. Please post your own comments on the blog and our Twitter and a collaboration of your tips will be posted on Sunday for all of us to share!
Happy Blogging!
<3 Mama
Subscribe to:
Posts (Atom)